How to Choose a Bag for a Family Photo Scanning Appointment
Keep family photos flat and in order from the front desk to the scanner and back home.
A stack of family photos may look small until you put it in the closed case you need to carry it to the scanner. Start with a flat protective case for the photos and the storage device the lab asks you to bring. A structured tote makes sense when your case fits easily through the top and the trip is short. A messenger can be easier to manage on a longer walk if the case clears the opening without flexing. Test the bag with the case shut, including the photos you expect to scan and those that may come home untouched.
Ask what your appointment can actually handle
Confirm the type of scanner, whether you need to reserve a station and how you can take home the files. The St. Louis County Library's scanning studio FAQ advises preparing prints before the visit so the booked time can go toward scanning. Nashville Public Library discusses appointments and ways to store digital copies. Follow the requirements of the branch you booked, including its rules about outside storage devices and which equipment can work with your originals.
Tell the lab if the photos are oversized, bound in an album, stuck down, curled or otherwise difficult to handle. Ask whether the staff can advise on equipment and preparation. Don't force a photo out of an old mount just because another library suggests bringing loose prints. If you need to preserve the album as a unit, ask what can be scanned in that form and plan around the closed album rather than the dimensions of a single print.
Estimate what you can handle in the booked time. Put the highest-priority photos in the first batch and bring a smaller second batch only if you want something to move on to. Check what happens if you need a follow-up appointment. An entire family album collection can take more space than you need to bring for a first visit. A well-chosen carrier should make a manageable batch easier to transport and put back in order.
Plan the trip for the whole closed case
A stack of prints and a protective case have different footprints. Measure the case around its outer edges, corners and closures. Compare that shape with the bag opening with the rest of your kit inside. If the case can go in only with the top of the tote spread wide, check that you can lift it back out beside the scanner. A stated capacity can't tell you whether a stiff corner clears a zipper or flap.
Put the case in without tilting or bending it beyond what the case maker or the lab recommends for your contents. Keep keys and a capped bottle away from the originals. If the case carries the photos safely on its own, give it its own place and use a smaller bag for your personal items. A textile outer bag does not turn a loose stack into protected transport. Ask staff about suitable handling when you have unusually fragile material.
Use a dry practice load with papers or another stand-in for your first trial. Carry the bag a short distance, set it beside a chair and lift out the case. Check if the bag hangs at an angle or if a strap catches on a corner. Return the case, close the bag and try it again with the outerwear you expect to wear. This rehearsal is most useful when the case is the same size and shape as the one going to the library.
Set up an order you can follow at the scanner
Before scanning, make a batch you can name
Give each group an identifier on its own divider or envelope rather than adding anything to a photo. Write down which group goes first. Choose a system your family will understand after the visit, even if the date or the names in a photo are uncertain. Keep each batch inside the protective case until you're ready to work with it.
During the session, keep pending and completed groups apart
Use one divider for the active batch and another for the prints you have finished. Keep the next batch inside the case. Follow the lab's directions for using the scanner. If an original doesn't behave as expected, ask the staff what to do before proceeding. The bag can stay closed while you work, with the case and your small export kit doing the active work at the station.
Before leaving, account for the files and the originals
Confirm that you can open a few representative files in the storage destination you intend to take home, subject to the lab's guidance. Check that the batch folders you see match the physical groups you scanned. Put the flash drive or other permitted storage device back in its assigned place. Orillia Public Library’s Memories Media Lab lists storage options for its own facility. Ask your lab if you aren’t sure what its workstation supports.
Compare a structured tote and a canvas messenger
Canvas Tote for a short carry and straight lift
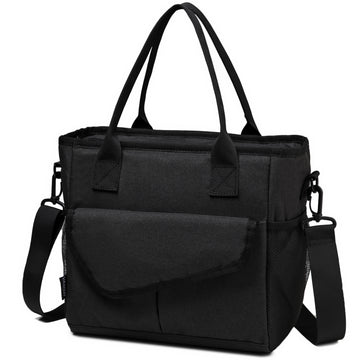
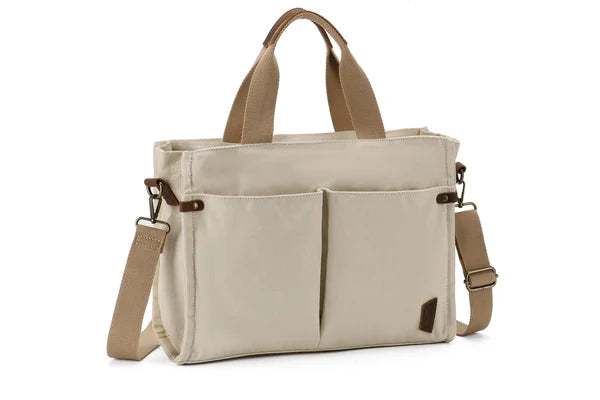
The Vaschy Canvas Tote Bag for Women is a structured tote listed at 16.2 L with top handles and a detachable shoulder strap. Compare it when a closed, suitably supported case will fit without tilting and you want to lift it straight out beside the work surface. Try the actual case with the small items already inside. Shop the Apricot Canvas Tote if you want a structured carrier that can also serve on everyday trips.

Set it down where you expect to unpack and check how the opening sits. Put the small storage device in a separate location from any drink and keep it easy to identify. If you can't lift the case out cleanly, don't pull it by a corner or open it inside the bag. Carry the case separately or compare a bag with a better opening for it.
Large Canvas Messenger for walking with the same case
The Vaschy Large Canvas Messenger Bag is listed at 18 L. Its front flap pocket has two buckles, giving you a place to try a small flat appointment note while the supported case travels in the main area. Verify the actual case opening and keep the case in the orientation appropriate for its contents. Shop the Denim Blue Large Canvas Messenger Bag if shoulder carry is more useful on the walk and the loaded bag passes the case test.

Try the case beside a chair. The flap and the way the bag hangs matter if you open it while seated. A wider bag may carry the same case more easily on one route and be more awkward to unpack at the end. Choose after practicing both motions. If the route includes crowded transit, check how the case moves inside the bag when you sit down or turn.

Check the case and the export kit at the same time
Put the closed case in the outer bag, and then try taking out the required storage device without moving the case. Reverse the order. If one item blocks the other, decide which item you use first at the branch. For a phone used to check an appointment, give it a small closed location outside the photo case. Give a permitted flash drive or other export device a distinct place where it can't disappear between a notebook and a hard case.
With a helper, simulate passing the bag to the person who is going to check in or take it home. Can that person identify the first batch without seeing every photo? A plain label on a divider or on the outside of the case can be enough. You don't need to expose family names or personal information on the outside of the outer bag. If you use a label, keep it useful to your family and follow the lab's instructions for the material itself.
Make a short list of the kit you will have when you leave. It might include the closed case, the actual photos and a drive holding the files. If the export method is cloud storage, ask how to confirm files were saved and follow the lab's process for signing out of a shared computer. Recheck the table, scanner and any area the lab assigns before closing the bag. Once home, verify that the files you expect are present and make a backup using a storage method appropriate for your family.
Decide where the bag waits during scanning
Ask how much space the lab gives you and where personal bags are allowed. A tote you like because it opens wide may be awkward if it has to sit beside a narrow workstation. A messenger that closes with the case inside may be easier to place by the chair but slower to reopen. At home, imitate the available space and take out the case one time. Let the case do the work at the scanner while the bag waits closed. If there is no room to unpack the case as planned, change the batch size or ask staff how to proceed.
Make the same case work on the way home
Picture a first session with two labeled groups of loose prints. You finish one group and part of the second. Instead of packing all the originals in one pocket, put the completed group back behind its divider and leave a marker in the unfinished group. Check that the final file saved is the one you think you scanned. This makes it possible to resume at the next appointment without opening every envelope.
If the case contains an album you were unable to scan, the case needs the same room it did on the way in. Don't count on freed space or pack another errand around the assumption that you'll bring fewer originals home. Use the original separation plan so the materials return in their existing order. When you get home, move both the photos and the export device out of the day bag and store them appropriately.
If you want to lift a supported case straight from the bag beside the scanner, shop the Apricot Canvas Tote. If you walk farther and can unpack the case without turning it, shop the Denim Blue Large Canvas Messenger Bag. Start with the case and the export device you actually need. The better bag keeps them reachable without putting your originals at the bottom of a pile.


