How to Choose a Crossbody Bag for a One-Camera Photo Walk
Pack around the time your camera spends in hand and the times it must go back in the bag. Compare two everyday crossbodies using your own case.
For a one-camera photo walk, choose a crossbody you can open while standing and close with the camera in its own case. A pocketed messenger makes sense when you’ll reach for a route card, phone or lens cap several times while the cased camera stays put. A larger crescent crossbody can make space for a layer on a longer route. Before deciding, practice putting the camera away at the three places you're likely to stop: a busy corner, a covered doorway and a café or another indoor stop.
Walk the route in your head before packing
Look at the organizer’s instructions for the meeting point, walk length and any indoor stops. Ask what you’ll need to take part in any particular exercise. Icon Photography School’s photo walk guide uses routes and creative constraints to make a walk easier to plan. If your group is trying reflections, for example, you can choose one camera setup that lets you follow that prompt and leave other equipment at home. If you’re bringing a phone, test it with the same bag-opening routine you’d use for a camera.
Pick one lens if you have an interchangeable setup and it fits the aim of the walk. Start with the equipment you already know how to handle. Try the camera in its protective case or sleeve with that lens attached if the case is designed for that configuration. Remove the camera and close the case again as directed. A different lens may change the shape of the entire kit, even when the body stays the same.
Anil Mistry’s guide to organizing a photowalk focuses on decisions such as the meeting point and route. Match the bag to those decisions. A meeting spot near a transit station may ask you to put the camera away for a busy portion of the trip. A walk with long pauses outside may call for gloves or a layer that won't live in the bag for the whole route.
Plan for the moments when you put the camera away
- When you arrive: Keep the camera in its case until you have space to take it out. Carry the route or confirmation where you can reach it separately.
- Between stops: Decide when you’ll keep the camera in hand and when you’ll return it to the case. Choose a routine that leaves you free to look where you're going.
- Before entering a building: Check its photography and bag instructions and keep the camera stowed wherever requested.
- At the end: Check for the camera, lens cap, cards and anything you set down. Close the bag before you head for the next stop.
Place small hard items away from the camera. Put a spare card in a holder you can distinguish from whatever you use for keys. Follow your device maker's guidance on packing batteries. Try the positions for your phone and any personal items before adding a water bottle. Keep liquids isolated from the camera kit and check that the bottle stays upright where you put it.
Try taking the camera out with the bag on your body
Start with the camera in its case and your strap where you expect to wear it. Open the bag while standing, take the case out, then return it to the same position. Try this with your hands in gloves if you expect to wear them. Notice what happens to a zipper pull or shoulder strap when the bag is under a jacket. Find a place to stand safely while using both hands for a camera and its case.
Repeat the test with a folded layer inside the bag. If the layer catches on the camera case every time, move it or try a bag that gives the two items their own space. If you're bringing a separate camera strap, see where it will sit when the camera is stowed. Keep it from tangling with the bag's zipper and check that the bag can close without pushing on the contents.
Run the same carry test on a simple and a layered route
For the first version, pretend you’re walking three blocks near home with one camera and no extra layer. Put your keys, phone and camera case in the positions you expect to use. Leave the bag on and retrieve the phone to check a map, then return it without opening the camera case. Repeat with the camera in a safe place to put it away. A zip pocket that’s easy to use at the front of the bag may become awkward once a coat covers the strap or the main compartment is full.
For the second version, add a folded layer and a personal item that will travel with you all afternoon. Run the same actions at a chair that stands in for a café seat. Try retrieving the layer first while keeping the camera case supported. Then reverse the order. If the layer comes out with the camera case or pulls on its strap, reorganize them and try again. The larger bag earns its space when you can use the layer and keep the camera where you expect it to be.
Choose one moment on the route to revise your setup. After a few stops, notice which zipper you keep reaching for and where you put the cap after using the camera. If the only problem is remembering a pocket, reassign it before considering a different bag. If you have to put the whole bag down each time you stow the camera, try a different opening shape or decide that this particular kit belongs in a purpose-built carrier.
If you’re sharing a camera, rehearse the handoff with the other person and decide who carries the outer bag. Each person should know where the lens cap and case go when you pause. Add that one extra handoff to your fit test. A second photographer often creates more transitions even when you still bring only one camera.
Do one final return-to-bag test after putting your gloves back on or adding your scarf. Check that the case closes correctly and that you can find the route before moving off again.
Compare a pocketed messenger and a crescent crossbody
For a small camera kit with several frequently used items
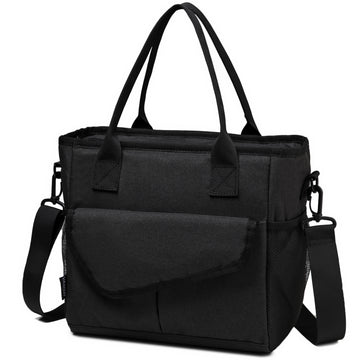
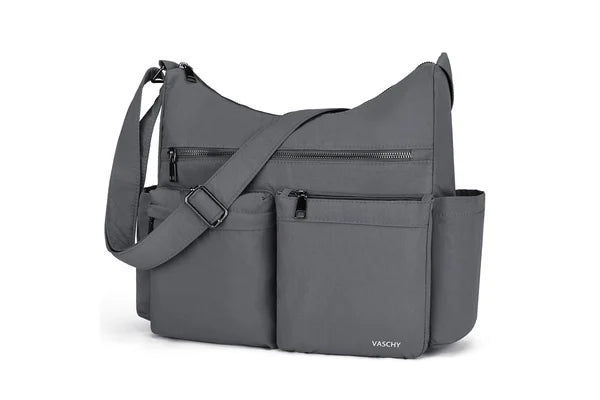
The VASCHY Nylon Crossbody Messenger Bag for Women has three front zippered pockets and an adjustable padded shoulder strap in the current listing. Try using one pocket for the phone or route and a separate place for the small kit you want to keep together. That helps if you need to open the bag for a ticket without opening the area you use for the camera case.
Check the actual opening with your cased camera. If the front pockets become harder to use when the main compartment is loaded, remove one accessory or put it somewhere it won't push against a closure. Give the route and the lens cap different homes. Try finding each one from memory with the main compartment closed. Repeat the retrieval once without looking.
Shop the Vaschy Nylon Crossbody Messenger Bag in Gray if you want a separate place for frequently used personal items beside a small camera kit.

For a longer walk with an extra layer
The VASCHY Crossbody Crescent Bag is listed at 14 L and has a soft crescent shape. Try it when the camera case shares the bag with a compact layer and other everyday items. Lay out the items first so the camera’s case has a consistent position. Check whether the narrower portions of the shape make it harder to stow your own case as the contents change.
Put the bag on, take a short walk and rotate it where you can reach it. If it moves around more than you like, adjust the strap or take out the largest nonessential item and try again. A soft shape may feel comfortable with the right load. A rigid piece of equipment can change where it rests against your body.
Shop the Vaschy Crossbody Crescent Bag in Light Green if you want to test room for an extra layer alongside the camera in its case.


Set a limit before adding another piece of equipment
Try the walk with one camera and a limited kit before changing the bag. After a few stops, note which things you reached for and which just occupied space. If you want multiple lenses, a larger body or purpose-built protection, compare a dedicated camera bag for that load. A bag choice is easier to judge after you’ve worked out what needs to be in hand and what has to stay packed.
Questions before the first walk
Will an everyday crossbody protect my camera?
Use the camera’s own suitable case or a protective solution designed for the kit. The two everyday bags discussed here are outer carriers. Check fit with the camera already inside its case.
Should the camera come out at every stop?
Follow the organizer and venue instructions. Put it away if you need your hands or if the next stop calls for it. A fast stow matters just as much as a fast draw.
Will a regular backpack work?
Try it if it handles the actual load comfortably. A backpack may suit someone who stops deliberately to remove the camera. A crossbody can suit the person who needs more frequent access and is happy with the weight on one shoulder.
Choose for the number of times you’ll open the bag
For a slim kit and regular access to small items, shop the Vaschy Nylon Crossbody Messenger Bag. If a layer is likely to change the size of the load, shop the Vaschy Crossbody Crescent Bag and test the opening with the layer and the cased camera together.


